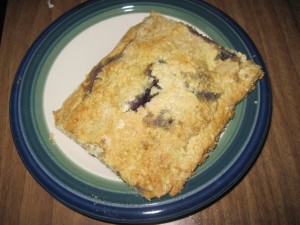
 Bread. Ug. I have tried and tried to find the ultimate gluten-free bread recipe and have resorted to buying Sami’s or Udi’s from the freezer section of my natural grocery store. Even Rudy’s is gross. So what’s a girl to do? I mean, we all MUST have our peanut butter toast, right? Well, sure, if you are willing to take out a second mortgage!
I was in bed this morning, angry that the sun woke me up WAY too early, when I started putting ingredients together in my head (I know, I need a life, but hey you are the benefactor of my neurosis…) Here is what I came up with and VIOLA! A gluten-free bread that you don’t have to spend your entire grocery budget on and it is rather simple to make.
Ingredients:
3/4 cup rice flour
1 1/2 cup Millet flour
3/4 cup potato flour
1/2 cup pure rice bran…optional. Picture above does not include bran
1/2 tsp baking soda
3 tsp or 1 tbsp baking powder
1 1/2 tsp guar gum
1/2 tsp salt
2 tbsp organic sugar
2 tsp active dry yeast
2 tsp of fennel seed (you can substitute this for dried fruit, raisins, flax-seed, nuts, or nothing..)
2 1/2 cups of water (Ok PLEASE PAY ATTENTION..YOU WAKE UP! YOU MUST USE THERMOMETER AND MAKE SURE YOUR WATER IS 105 degrees….NO EXCEPTIONS)
2 tsp of apple cider or rice vinegar
1/2 milk
1/4 cup oil
Throw it all into the bread machine. Yes, all of it. In any order. Set it to the darkest crust, a three-pound loaf (cook time approx 3 hours) and on basic bread.
Yep. It’s that easy. If you don’t have a bread machine, see instructions below….
Put all dry ingredients into mixing bowl for stand mixer. Slowly add liquids while mixing. Cover mixing bowl with seran wrap and then top off with damp towel. Put in a dry, warm place (Optimum temp about 78 degrees.) Let rise for a couple of hours.
Now spray your hands with cooking spray and scoop out the dough with your fingers. It’s time to get down and dirty! No, I’m not getting kinky…Knead on well floured surface (rice flour). Spread gently in to greased loaf pan, shaping the top of the loaf to a nice even, smooth surface. Try not to press down the dough…remember FLUFFY BREAD. Spray the top with cooking spray. Cover with seran wrap. Cover with towel. Let rise. In winter, look for a nice toasty room, next to a floor register (Hahaha..I live in an old home…) or using your grandmother’s trick with the oven (I’ve yet to have much luck with boiling water in the oven, preheating the oven, etc…you are on your own with this one.) Just remember, the level your bread rises will roughly be the height your bread is when finished baking. It will not rise much more in the oven.
Tips about making bread (lessons learned the hard way…)
Temperature is KEY. Keeping your bread dough about 78 degrees is essential to help it rise. Use thermometer every 30-45 minutes…and I mean in the bread dough, not elsewhere.
Don’t rush a good thing! Let it rise and rise if needed. Sometimes (Esp in winter) this could take all day. I know, I know. I hate this too.
Water helps bread lift. Not fluffy enough. Add more H2O.
Salt kills yeast. Yeah, it’s a deadly little granule. But we love it anyways.
Give yourself a break. Sometimes it just doesn’t work. Go get a pedicure and try again. Seriously.


You must be logged in to post a comment.